


Classroom Management | Aug 28, 2012
Ideas for Classroom Seating Arrangements

By Angela Watson
Founder and Writer
Ideas for Classroom Seating Arrangements
By Angela Watson
Need ideas for seating arrangements in your classroom? On this page, you’ll find tips on arranging student desks in four different formations, complete with photos from My Classroom Tours. You can click on most of the pictures to view the complete tour for that particular room. Whether you’re looking for a classroom seating chart, seating map, or seating plan, you’re sure to find ideas for setting up your classroom in a way that meets your students’ needs.
Types of student desk arrangements and seating plans
There are several basic desk arrangements that I like to rotate between:
- Stadium Seating (or Angled Rows with Desks Touching)
- Modified U (or Horseshoe)
- Groups (or Teams)
- Combination (desks in various positions)
I’ve never had all my students’ desks separated, as that takes up too much space and isn’t conducive to the teaching methods I use, so I can’t give advice on that arrangement. I’ve tried pretty much everything else you can think of, though! Check out the classroom arrangement ideas blog post for tips on fitting everything into your classroom and making room for all the key areas (teacher desk, computers, rugs, centers, etc.)
Stadium seating (angled rows with desks touching)
- Pros: Enables the teacher to see what every child is doing, gives all students a clear view of the front of the room, can take up less floor space than other arrangements, makes it easy for students to work in pairs or move their desks into groups for cooperative work
- Cons: Does not work well with a large number of desks because students will be too far away, less effective in terms of management when more than two rows are used, less suitable for classrooms that use cooperative learning methods for the majority of the day
Yes, I do think that placing your students’ desks in rows is a perfectly acceptable classroom arrangement! I like having desks in angled rows (also called stadium seating) because all the kids are facing me. This helps me see if they’re on-task and makes it easier for them to concentrate.
Because the students’ desks are touching one another (and not completely separated), the angled rows mean that students can work with partners without having to move their desks because they are sitting right alongside one another. When it’s time for group work, they can easily shift the desks to work together in fours, or sit at tables in the back of the room or on the floor.
The advantage of angled over straight-facing rows is that the angle makes it easier for students to see and leaves space in the front of the room for a rug, open area, overhead projector cart, podium, table, and so on. The photo above shows the angled style in a different classroom, this time with a projector cart in the middle instead of a rug and the desks pulled much closer to the front of the room. This room is larger than the one above, and I rarely had students move their desks for group work: they did partner work with the person next to or behind/in front of them, and then for group work, they moved to sit at the tables and rug areas you see placed around the classroom. They absolutely loved this because it gave them the opportunity to get out of their desks and sit some place different!
- Pros: Allows you to fit many desks into a small space, students talk less during teacher-direct and independent activities when they are further apart from their friends, make partner work simple
- Cons: Spreads children out considerably so that it can be hard to address them all, makes group work harder because the desks can’t easily be moved around
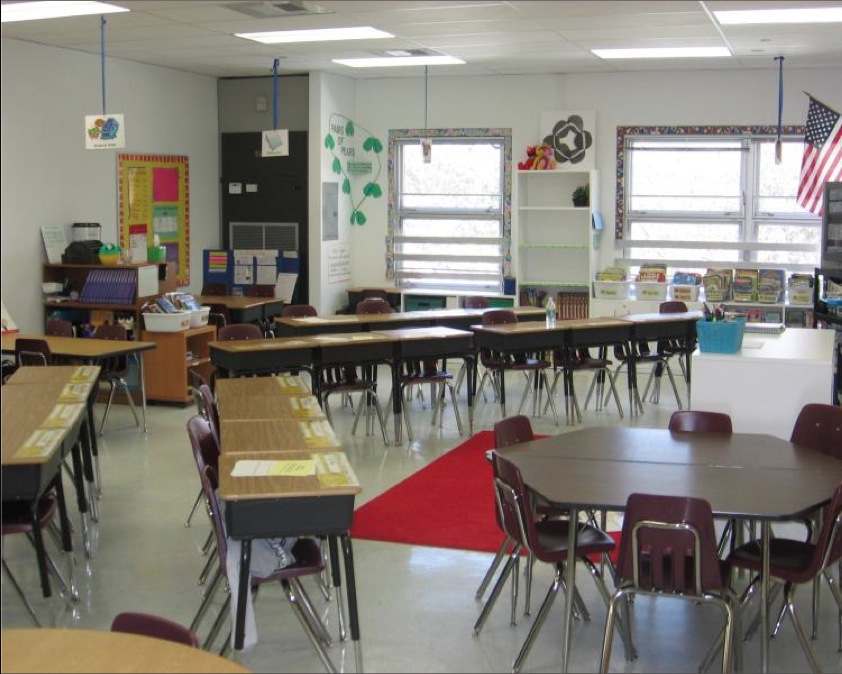
As shown above, I began one particular school year with 22 desks in a modified horseshoe shape, leaving a small break in the middle and sides of the desk arrangement to use as walk-through spaces. This created a large center space that I could stand in to see each student’s work.
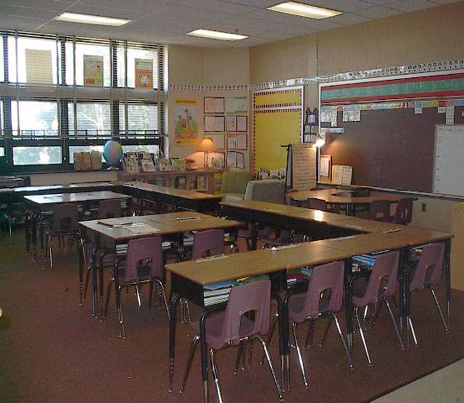
The photo above shows what the same arrangement looked like the following year when I took away the front part of the horseshoe and started adding desks to the center in clusters. This arrangement had seats for 27 students. It looks a bit crowded in the picture, but it worked well because I could see everyone’s face and move around to help them easily. The modified U was one of the few ways I could have that many desks and still provide room for all the areas I like to leave in the back of the room (tables, classroom library, etc.). This set-up also provided a large space in the front of the room for kids to sit on the rug while I taught. (More about this in the classroom arrangement ideas blog post).
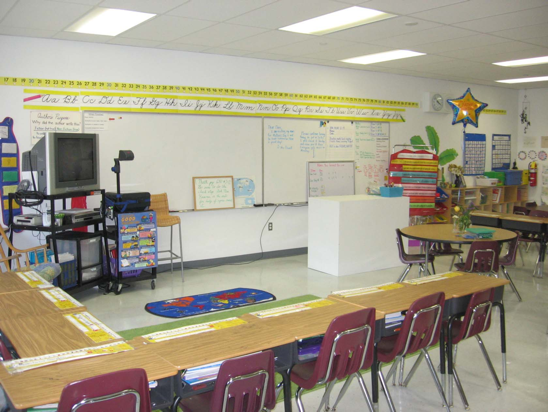
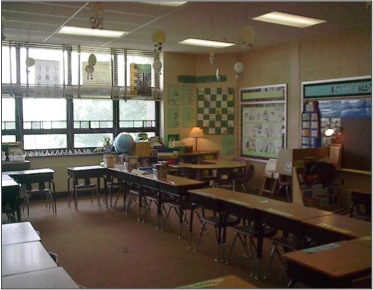
The two pictures above show a modified U in a different classroom with only 20 desks. The photo on the top was taken from the entrance, and the one underneath was taken from the opposite corner in the back of the room. The U-shape was perfect for the end of the year when I was doing less direct instruction and the kids were working more independently (with their desks that far away from one another, it can be hard to teach everyone at the same time). Students do tend to talk less when they are this spread out. Having the table and rug in the center was also helpful, because I could move students to these areas during instruction if they needed to see better or if they were playing around at their desks. I was able to utilize the space against the walls and windows for tables and group work areas.
Groups/Teams
- Pros: Can save floor space even with many desks, supports cooperative work.
- Cons: Promotes off-task behavior, distracting for many students.

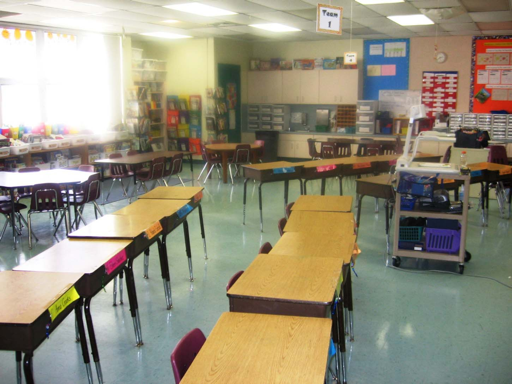
This was an arrangement I wasn’t able to use when I had close to 30 kids in my class, because when children were facing one another at their desks, it was just too much work to keep them from talking during teacher-directed instruction and independent work times. However, I have found that there are some smaller classes of children who can handle sitting in groups, and it also worked well when I taught in schools that promoted a lot of collaborative learning. This arrangement shows 3 groups of 5, with 2 kids who could not handle the groups sitting by themselves off to the side. I loved having the groups angled like this because all the kids could see the board and I could stand in one spot and see everyone’s face and work area.
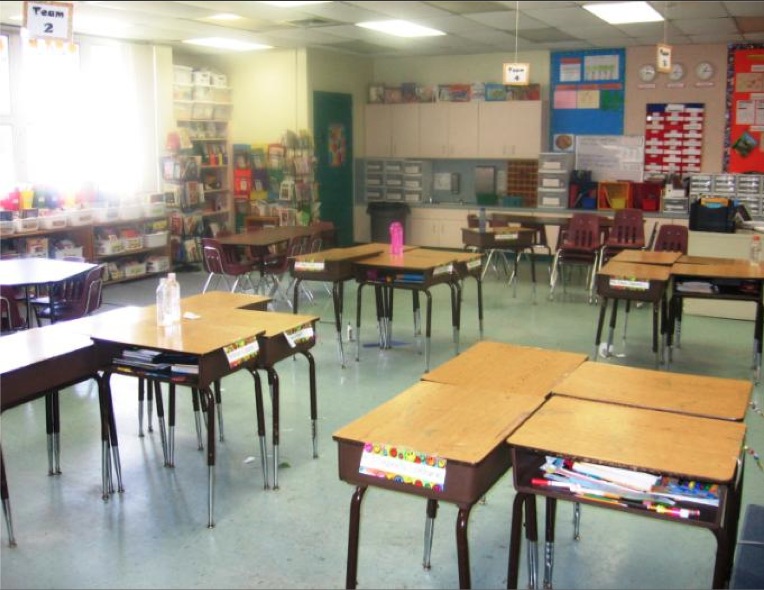
The arrangement in the photo above was designed to have 4 groups of 4 with one child sitting alone for most of the day and pulling his desk up to a group to work collaboratively as appropriate. A new student enrolled and one of the groups then had 5, for a total of 18 kids. The desks are not set on an angle so there would be space in the middle of the groups for my LCD projector cart.
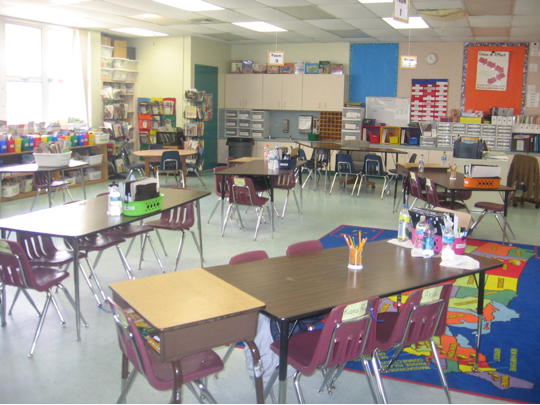
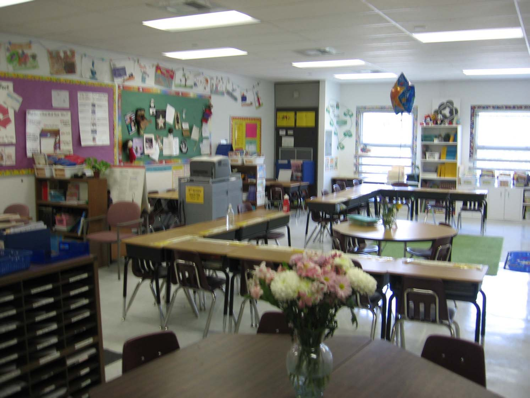
During my last year in the classroom, I got rid of the desks and switched to tables! I had been wanting to do this for years, and when I stepped foot in the room in August and saw how the custodians had stacked all those desks in a corner, I realized how much more room I would have. I had all the desks removed and replaced with tables (oh, yes, the custodians looooved that idea), and I was THRILLED with the results. You can read more in my blog post Tables vs.Desks. I do keep desks for children who have a hard time working in close proximity to others. The desks are situated near the tables: if a child has issues, he simply moves the desk back a few feet and gets himself together, then rejoins the team later.
Combination arrangements
- Pros: Provides for each individual student’s needs; extremely flexible.
- Cons: Requires special procedures for passing out and collecting papers/supplies.
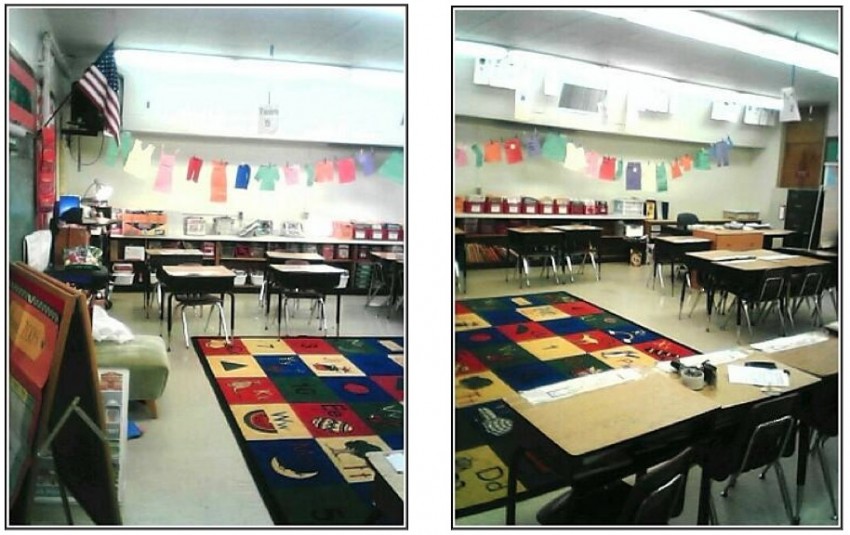
One year, most of my class had extremely challenging behaviors. The best desk arrangement for those children didn’t fit any standard set-up. Instead, I had the kids who needed to sit alone in separated desks (shown on the left), usually with a chart stand separating them into two rows so they couldn’t see the person next to them. In the picture on the right, you can see two desks pressed together: one was for a girl and a boy that worked exceptionally well together. I had four kids who worked best sitting in a group, so their desks were pushed together. Other children could better handle sitting in a row, which you can see closest to the camera in the right hand photo. The close proximity helped them because they could tell what they were supposed to be doing by looking at their neighbors, but they didn’t have anyone directly facing them. Another child’s behavioral outbursts were so severe that his desk was placed in the very back of the classroom where he would be less likely to hurt other students. As you can see, this ‘non-arrangement’ actually looks very nice and contributed to positive classroom management. So, you don’t have to limit yourself to one particular set-up if a variety of arrangements will work best for you and your students.
Angela Watson
Founder and Writer
Discussion
Leave a Reply
OR

Join our
community
of educators
If you are a teacher who is interested in contributing to the Truth for Teachers website, please click here for more information.


My room would fit in 1/4 of the room shown!
Hi, Lynn! The rooms above are all different sizes. The one with the brown rug and the last one shown were quite small. Keep in mind that the camera pushes objects away so the rooms appear larger than they really are. If you take pictures of your own classroom, you’d probably be amazed at how big it looks!
That said, I am working on a page of tips for organizing and setting up a small classroom because I know it’s something a lot of teachers deal with. If you want to have your classroom featured on it, let me know! I’d love to see your pictures!
So true about the picture distorting the size. I look back over my teaching years in various classrooms and at first I’m surprised out how big the room appeared, then I think of my bumps on the thigh from maneuvering between desks, etc. Enjoyed your suggestions.
Thanks,
Kristi
Indeed. It’s unreal how small the classrooms are in schools that have been built within the last few years. It definitely limits choices.
I liked looking through these pictures. It gets my creative juices flowing, even though I’m pretty limited in what I can do with the desks in my room. I teach in a middle school, and the desks are large and one piece. I also have 33 of them in a very small room. However, I have dreams of one day having small tables with chairs for the kids to use, which might make things a little easier on me since I like having the kids in groups rather than in individual rows.
Hi, Jennifer! Yep, tables would definitely open up a lot more space for you! That’s a great way to do it, if you can find them in your building somewhere!
I am interested in finding where you purchased the navy blue PVC room dividers? Any help will be appreciated!
Hi, Rebecca, I didn’t buy any room dividers. Which picture did you see that in?
I love your ideas, but I have a problem with students moving the desks a lot. Do you have any ideas d that would help me? I really appreciate it if you do.
Thanks
San Juanita
AM A YOUNG MOROCCAN TEACHER.. ENGLISH IS MY MAJOR .. .I JUST STARTED MY NEW SMALL PROJECT ..A KINDER GARDEN ..MY KINDERGARDEN WOULD BE THE 1ST IN MY CITY WHICH GIVES ENGLISH COURSES ..FOR CHILDREN ..THE PROBLEM I HAVE IS THAT I DONT HAVE THE MATERIELS AND TOOLS TO WORK WITH .. AT 1ST I WAS REALLY EXCITED BUT I HAD A VERY HARD TIME MAKING THAT DREAM COME TRUE.SPECIALLY WHEN U DONT HAVE MUCH SUPPORT .THANKS .
Best of luck for your dream project. It would have been a good idea to have some hands on experience in running a kindergarten. If you could not get enough materials, I would be able to help you.
Best wishes LaylaAbid
Johnson
LOL